
Table of Contents
ToggleA weedy patch of grass and a sagging fence don’t inspire much outdoor living. But turning a neglected yard into a usable, attractive space doesn’t require a landscape architect’s budget or a crew of professionals. Most homeowners can tackle high-impact projects over a few weekends with basic tools, some sweat equity, and a clear plan. The following ideas focus on practical, achievable improvements that add function and curb appeal without very costly or requiring specialized skills.
Key Takeaways
- DIY backyard landscaping ideas can transform a neglected yard into an attractive, functional space using basic tools and materials without requiring professional contractors or specialized skills.
- Defined garden beds with edging provide clean lines and prevent grass invasion using affordable options like plastic ($0.50–$1.50/foot), steel ($3–$6/foot), or natural materials like stone and timber.
- Gravel pathways and paver patios are accessible DIY projects that cost $2–$6 per square foot and turn unused lawn into functional outdoor surfaces in a single weekend.
- Native plants adapted to your region reduce water and fertilizer needs by up to 50% while supporting local pollinators and thriving with minimal maintenance once established.
- Low-voltage landscape lighting systems ($100–$200 for basic setup) enhance safety and ambiance while remaining DIY-friendly with simple cable installation and no specialized electrical work required.
- A freestanding pergola or dedicated seating area ($200–$1,200) completes an outdoor living space and provides shade, structure, and a focal point for relaxation and gatherings.
Create Defined Garden Beds with Edging
Loose mulch creeping onto the lawn and shapeless planting areas make even healthy plants look messy. Installing edging gives beds clean lines and prevents grass from invading.
Material options include:
- Plastic or vinyl edging: Inexpensive ($0.50–$1.50 per linear foot), flexible for curves, but can heave in freeze-thaw cycles. Stake it every 3–4 feet.
- Steel or aluminum edging: More durable, holds crisp lines, and sits nearly flush with the soil. Costs $3–$6 per foot.
- Brick or stone: Laid end-to-end or stacked for a low border. Requires a stable base (compacted gravel or sand) to prevent shifting.
- Pressure-treated 4×4 or 6×6 timbers: Good for raised beds. Use landscape screws and rebar stakes for anchoring on slopes.
Installation basics: Mark the bed outline with a garden hose or spray paint. Dig a narrow trench (about 4–6 inches deep for rigid edging, 2–3 inches for flexible types). Set the edging level, backfill, and tamp the soil. For a polished look, top-dress beds with 2–3 inches of shredded hardwood mulch or composted bark.
Edging isn’t structural, so no permits are required. It’s a solo project that takes a few hours for a 20-foot bed.
Build a Simple Patio or Pathway
A patio or pathway turns unused lawn into a functional surface for seating, grilling, or directing foot traffic. Both are achievable DIY projects if the site is relatively flat and doesn’t require major grading.
Gravel Pathway
The simplest option. Excavate 4 inches deep, lay landscape fabric to suppress weeds, and add 2 inches of compacted crushed stone (3/4-inch minus) topped with 2 inches of pea gravel or decomposed granite. Edge with metal or stone to contain the gravel. Cost runs $2–$4 per square foot for materials.
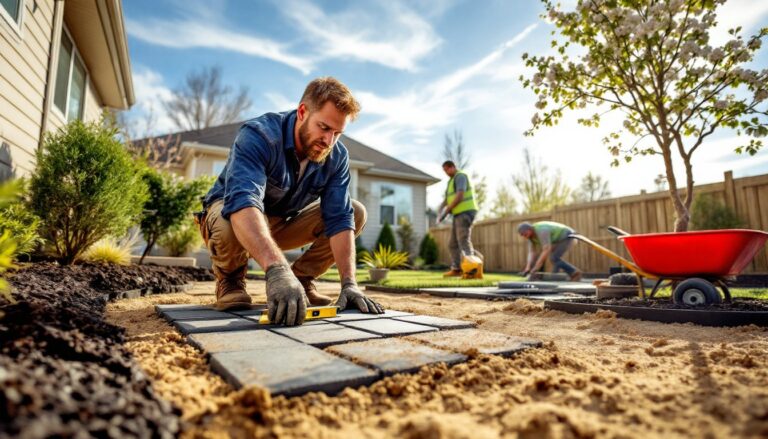
Paver Patio
More work, but durable and attractive. For a 10×10-foot patio:
- Excavate to a depth of 7–8 inches (allows for 4 inches of gravel base, 1 inch of sand, and 2-inch-thick pavers).
- Compact the subgrade with a plate compactor (rent for $60–$90/day). This step is critical for preventing settling.
- Lay 4 inches of crushed stone base in 2-inch lifts, compacting each layer.
- Screed 1 inch of coarse sand (concrete sand, not play sand) over the base.
- Set pavers in your chosen pattern (running bond, herringbone, etc.). Tap them level with a rubber mallet.
- Sweep polymeric sand into joints, mist lightly, and let it cure.
Concrete pavers cost $2–$6 per square foot: natural stone runs $8–$15. A patio this size is a two-person weekend job if you rent the compactor and have a wheelbarrow and level.
For patios larger than 120 square feet or projects involving retaining walls over 4 feet, check local codes, some jurisdictions require permits or engineered plans. Many homeowners find inspiration in different patio configurations when planning outdoor hardscapes.
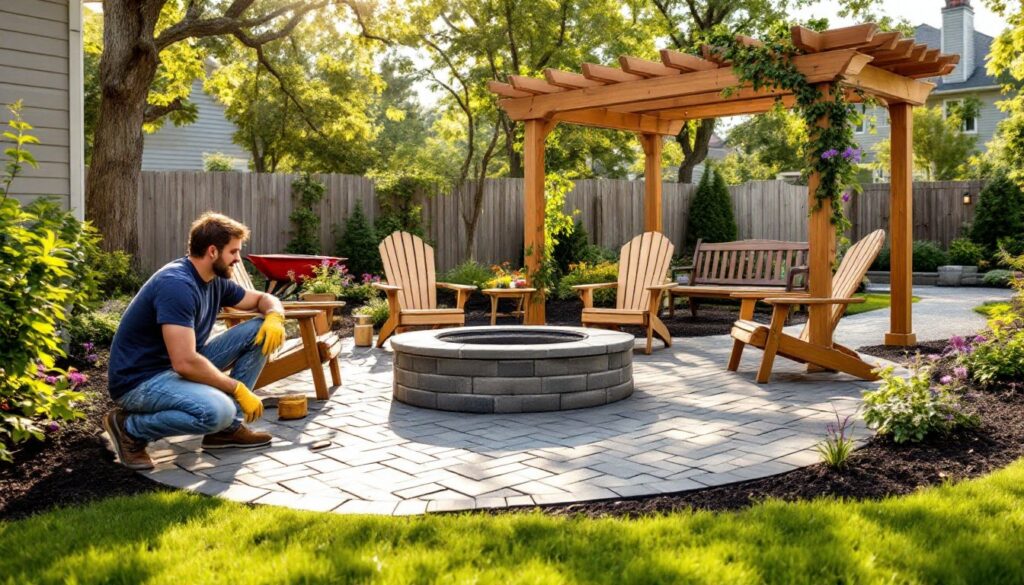
Add a Fire Pit as a Focal Point
A fire pit extends outdoor use into cooler months and anchors a seating area. Options range from portable steel bowls to permanent masonry rings.
Prefab Steel Fire Pit
The quickest route. A 36-inch steel bowl costs $150–$400. Set it on a noncombustible base (gravel, pavers, or a concrete pad) at least 10 feet from structures and overhanging branches. Check local fire codes, some municipalities restrict open burning or require spark screens.
DIY Block Fire Pit
For a permanent installation:
- Mark a circle 36–48 inches in diameter. Excavate 4–6 inches and fill with compacted gravel.
- Lay the first course of fire-rated concrete blocks or retaining wall blocks (not standard CMUs, which can crack from heat). No mortar needed for the first ring.
- Stack two to three courses, offsetting joints like brickwork. Use high-temp mortar or masonry adhesive for stability if desired.
- Line the interior with a steel fire ring (sold at hardware stores for $50–$100) to protect the blocks and contain ash.
Material cost: $100–$200 for a basic 4-foot-diameter pit. This is a one-day project for two people. Always keep a hose or extinguisher nearby, and never burn treated lumber or trash.
If installing a natural gas line for a gas fire pit, hire a licensed plumber or gas fitter, DIY gas work is illegal in most areas and dangerous.
Incorporate Low-Maintenance Plants and Native Species
Choosing the right plants saves water, reduces fertilizer and pest control, and cuts mowing time. Native species are adapted to local climate and soil, so they thrive with minimal input once established.
Why native plants matter: They support local pollinators, resist regional pests, and tolerate drought better than exotics. A yard planted with native grasses, perennials, and shrubs can cut irrigation needs by 50% or more compared to traditional turf.
Examples by region (consult regional planting guides for specifics):
- Northeast: Black-eyed Susan (Rudbeckia), switchgrass (Panicum virgatum), winterberry (Ilex verticillata).
- Southeast: Coontie (Zamia integrifolia), beautyberry (Callicarpa americana), muhly grass (Muhlenbergia capillaris).
- Midwest: Purple coneflower (Echinacea purpurea), little bluestem (Schizachyrium scoparium), serviceberry (Amelanchier).
- Southwest: Desert marigold (Baileya multiradiata), agave, penstemon.
- Pacific Northwest: Sword fern (Polystichum munitum), Oregon grape (Mahonia aquifolium), kinnikinnick (Arctostaphylos uva-ursi).
Planting tips: Amend heavy clay with compost, but don’t over-fertilize natives, they’re adapted to lean soils. Water deeply during the first year to establish roots, then scale back. Mulch with 2–3 inches of shredded bark to suppress weeds and retain moisture.
For homeowners interested in sustainable practices, exploring eco-conscious planting strategies can reduce both maintenance and environmental impact.
Install Outdoor Lighting for Ambiance and Safety
Landscape lighting highlights architectural features, illuminates pathways, and deters intruders. Low-voltage systems (12V) are the DIY-friendly standard.
Low-Voltage Lighting Basics
A typical kit includes a transformer (plugs into a standard 120V GFCI outlet), cable (12- or 14-gauge direct-burial wire), and fixtures (path lights, spotlights, well lights). Transformers range from 150W to 600W: calculate total wattage of all fixtures and choose a transformer rated at least 20% higher.
Installation steps:
- Plan the layout. Space path lights 6–8 feet apart. Use spotlights to uplight trees or accent walls.
- Run cable from the transformer along the route. Bury it 6–12 inches deep (check local code) or secure it along fences with cable staples.
- Connect fixtures using built-in piercing connectors (most low-voltage fixtures pierce the cable insulation, no stripping required).
- Set the timer on the transformer for dusk-to-dawn or scheduled operation.
A 150W transformer and six path lights cost $100–$200. Solar path lights are even simpler (no wiring), but output is weaker and batteries degrade in 2–3 years.
Safety note: Low-voltage wiring is safe to handle while energized, but always use a GFCI-protected outlet and waterproof wire connectors. If installing line-voltage (120V) lights or tapping into household circuits, hire a licensed electrician, this work falls under NEC (National Electrical Code) and typically requires a permit.
For ideas on pairing lighting with hardscape elements, consider how illumination enhances natural stone accents in evening hours.
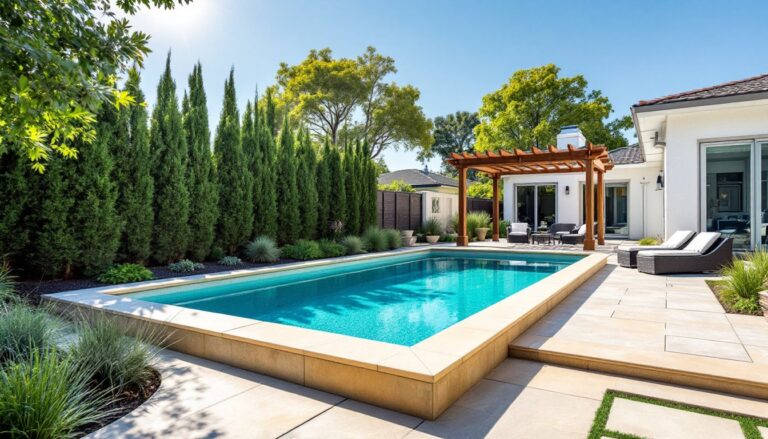
Design a Cozy Seating Area or Pergola
A dedicated seating area or pergola defines outdoor living space and provides shade and structure. Both are achievable for intermediate DIYers.
Simple Seating Area
Start with a level surface (patio, gravel pad, or even a mowed patch of lawn). Add a mix of seating: a weather-resistant bench, a pair of Adirondack chairs, or built-in bench seating from 2×4s and 2×6s (use exterior-grade screws and stain or seal the wood). Frame the area with planters, low shrubs, or a trellis for privacy.
Total cost for DIY bench seating and a few plantings: $200–$500.
Freestanding Pergola
A 10×10-foot pergola provides partial shade and supports climbing plants. Basic structure:
- Four 6×6 posts (pressure-treated or cedar) set in concrete footings 24–36 inches deep (below frost line in cold climates).
- Two 2×8 beams spanning between posts.
- 2×6 or 2×4 rafters laid across the beams at 16- or 24-inch spacing.
- Hardware: galvanized or stainless steel post bases, joist hangers, and lag bolts.
Construction outline:
- Lay out post locations and dig footings (use a post-hole digger or rent an auger).
- Set posts plumb in concrete. Let cure 48 hours.
- Attach beams to posts with carriage bolts or structural screws.
- Install rafters using joist hangers or notched birdsmouth cuts.
- Finish with stain, paint, or leave to weather naturally (cedar and redwood).
Material cost: $600–$1,200 depending on lumber choice. This is a two-person weekend project.
Permitting: Most jurisdictions require a permit for structures over 200 square feet or anything attached to the house. A freestanding 10×10 pergola may be exempt, but check with your local building department. If anchoring posts in concrete, confirm footing depth meets frost-line requirements.
Inspiration for outdoor structures and detailed layouts can be found in design galleries that feature regional styles.
When planning seating zones and walkways, integrating durable materials like landscape bricks can tie together different elements of the yard.
Conclusion
Transforming a backyard doesn’t demand a contractor’s crew or a five-figure budget. With clear goals, the right materials, and a willingness to learn as you go, most homeowners can handle edging, patios, fire pits, planting, lighting, and shade structures. Start with one project, master the techniques, and build from there. The outdoor space is worth the effort.