
Table of Contents
ToggleOverhauling a tired backyard doesn’t require a contractor’s budget or a landscape architect on retainer. With strategic planning, repurposed materials, and smart plant choices, homeowners can create a welcoming outdoor space without draining their savings. The key is prioritizing high-impact changes that look intentional, not cheap. In 2026, inflation has made materials pricey, but that only sharpens the need for resourcefulness. This guide walks through actionable landscaping ideas that deliver professional-looking results while respecting a tight budget, no fluff, just practical tactics anyone can tackle over a few weekends.
Key Takeaways
- Plan your backyard landscaping project by measuring the yard, sketching a layout, and prioritizing visible zones to maximize impact while staying within budget.
- Mulch and gravel are the most affordable ground cover options—bulk purchases from landscape supply yards cost less per unit than bagged materials and cover ground more efficiently.
- Choose low-maintenance perennials and native plants suited to your USDA hardiness zone to reduce long-term watering, fertilizer, and labor costs over annuals.
- Repurposed materials like cinder blocks, salvaged wood, reclaimed brick, and broken concrete create professional-looking raised beds and borders for a fraction of new material costs.
- Define pathways with mulch borders, stepping stones, or DIY concrete pavers to signal intentional design and make your yard feel polished without contractor expenses.
- Layer budget landscaping investments strategically—focus first on structural elements like paths and beds, then add plants and decor gradually to avoid overextending resources.
Start With a Clear Plan to Maximize Your Budget
Before buying a single bag of mulch or digging the first hole, measure the yard and sketch a rough layout. This doesn’t need to be a CAD drawing, grid paper and a pencil work fine. Mark existing features (trees, sheds, slopes, utility access) and note sun exposure throughout the day. South-facing beds get full sun: north-facing spots stay shaded.
Prioritize zones by visibility and use. Front yards and views from the kitchen window matter more than a back corner no one sees. Focus budget dollars where they’ll be noticed. Decide which areas need foot traffic paths, which can handle ground cover, and where focal points (a small tree, a bench, a raised bed) make sense.
Measure twice, buy once. Nothing blows a budget faster than overbuying materials or realizing halfway through that drainage wasn’t considered. Walk the yard after a heavy rain to spot low areas where water pools, these need grading or French drains before any cosmetic work. If the slope near the foundation is severe or the yard has persistent drainage issues, consult a pro. Fixing water problems later costs far more than addressing them upfront.
Use Mulch and Gravel for Affordable Ground Cover
Bare dirt looks unfinished and invites weeds. Mulch and gravel are the most cost-effective ways to cover ground and give beds a clean, intentional look. A 2-cubic-foot bag of shredded hardwood mulch runs $3–$5 and covers roughly 12 square feet at a 2–3 inch depth. Buy in bulk from a landscape supply yard if the project covers more than 100 square feet, bulk delivery (by the cubic yard) costs less per unit and skips the endless bag-loading.
Shredded hardwood mulch works well in planting beds, suppresses weeds, and breaks down over time to improve soil. Cedar or cypress mulch lasts longer but costs more. Skip dyed mulch unless the color fits the aesthetic, it fades unevenly. Spread mulch in spring after the soil warms: avoid piling it against tree trunks or home siding, as that traps moisture and invites rot or pests.
Gravel suits pathways, driveways, and low-maintenance beds. Pea gravel (smooth, ¼-inch stones) costs $30–$50 per ton and looks tidy but shifts underfoot. ¾-inch crushed stone (often called “crusher run” or “road base”) compacts better for paths and costs less. Lay landscape fabric underneath gravel to block weeds: skip the fabric under mulch in planting beds, as it prevents organic matter from enriching the soil. For a modern look, consider using landscaping rocks in combination with gravel for textural contrast.
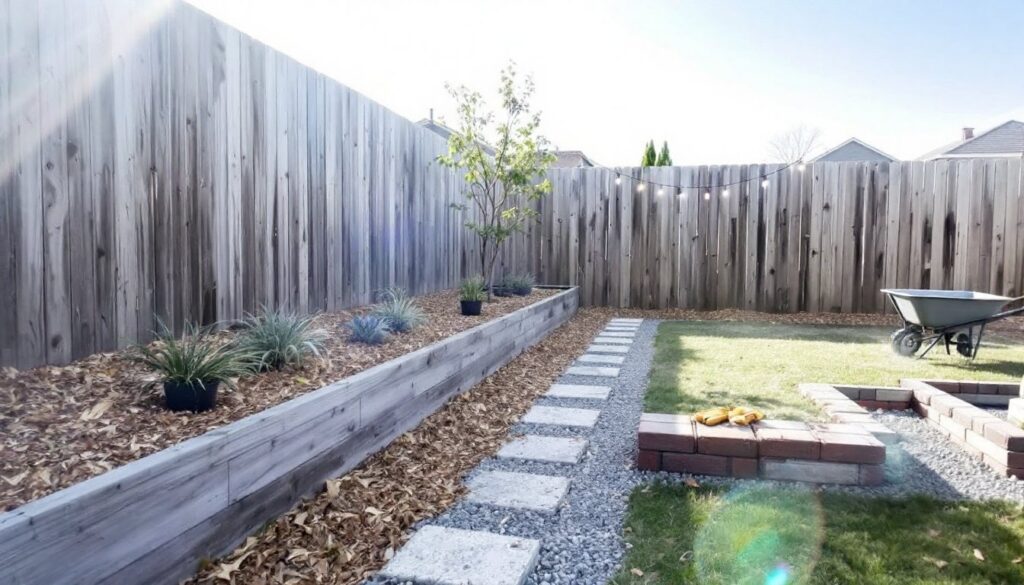
Create Garden Beds With Repurposed Materials
Raised beds add structure and make planting easier, but buying pre-fab kits or composite lumber gets expensive. Salvaged materials work just as well and often look better. Cinder blocks (around $1.50 each) stack into sturdy beds and cost a fraction of treated lumber. Lay them in a running bond pattern (stagger the joints like brickwork) for stability. The hollow cores can hold soil for herbs or small flowers.
Untreated lumber or reclaimed wood from pallets, old fencing, or construction sites can frame beds. Avoid pressure-treated lumber in vegetable beds if there’s concern about chemicals leaching into edible crops, though modern ACQ-treated wood is considered safe by the EPA. Cedar or redwood resist rot naturally but cost more. For a budget bed, 2×6 or 2×8 boards (actual dimensions: 1½” × 5½” or 1½” × 7¼”) work well. Secure corners with galvanized deck screws or angle brackets.
Stone or broken concrete (urbanite) makes durable, free-form bed borders. Check Craigslist or neighborhood groups for free broken concrete from driveway removals. Stack pieces dry (no mortar needed) for a rustic look. Wear work gloves and safety glasses when handling broken concrete, edges are sharp.
Edge beds with simple materials like steel landscape edging (about $1 per linear foot), brick set on edge, or even rot-resistant branches (willow or black locust) woven into a low wattle fence. The goal is a clean line that separates lawn from bed and keeps mulch from migrating.
Choose Low-Maintenance Plants That Save Money Long-Term
The cheapest plant is one that doesn’t die or require constant care. Perennials cost more upfront than annuals but return year after year. Native plants adapted to the local climate need less water, fertilizer, and pest control, meaning lower long-term costs and less weekend labor.
Research the USDA hardiness zone (find it on the USDA website by ZIP code) and buy plants rated for that zone or colder. Groundcovers like creeping thyme, sedum, or pachysandra spread to fill space and choke out weeds, reducing mulch needs over time. Ornamental grasses (blue fescue, maiden grass, fountain grass) add height and texture, tolerate drought, and need minimal pruning, just cut them back once in early spring.
For shrubs, spirea, potentilla, and barberry are tough, deer-resistant, and inexpensive at local nurseries. Buy small (1-gallon pots instead of 5-gallon), they catch up in growth within two seasons and cost half as much. Late summer and fall are clearance seasons at garden centers: perennials marked down 50% will establish just fine if planted six weeks before the first hard frost.
Skip high-maintenance plants like hybrid tea roses or fussy tropicals unless there’s a compelling reason. Water-wise designs inspired by eco-friendly landscaping principles can cut irrigation costs significantly. Group plants by water needs (“hydrozoning”) so thirsty specimens aren’t mixed with drought-tolerant ones. Mulch heavily around new plantings to conserve moisture and give roots time to establish.
DIY Pathways and Borders for a Polished Look
A defined path, even a simple one, signals intention and makes a yard feel designed. The easiest budget path is mulch or wood chips bordered by stone or timber. Dig out 2–3 inches of soil along the path route, lay landscape fabric, and fill with mulch. Edge with pressure-treated 4×4s (actual size: 3½” × 3½”) or large stones to keep the mulch contained.
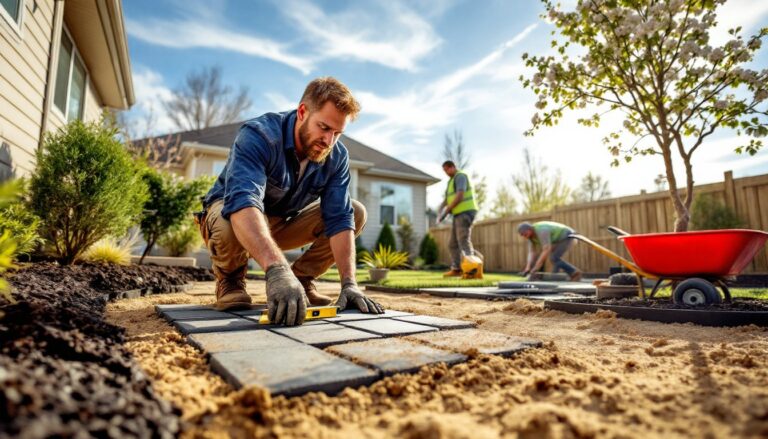
Stepping stone paths cost more but look sharp. Concrete pavers (12″×12″ or 16″×16″) run $1–$3 each at home centers. Space them 18–24 inches apart (one comfortable stride) and set them level with the surrounding lawn so a mower can pass over. Excavate 4–6 inches, add 2–3 inches of ¾-inch gravel for drainage, then 1–2 inches of coarse sand to level the paver. Tamp everything down with a hand tamper or a scrap 4×4. Check level with a 24-inch spirit level.
For a modern twist, pour simple DIY concrete pavers using cardboard or wood forms. Mix an 80-pound bag of Quikrete (around $4.50) with water in a wheelbarrow or mixing tub, pour into greased forms, and let cure for 48 hours. Wear a dust mask when mixing concrete, silica dust is harmful.
Brick or stone borders add polish to beds and paths. Salvaged brick is often free or cheap from demolition sites. Lay brick in a soldier course (standing on end) or sailor course (flat) and backfill with soil. No mortar is necessary for informal gardens. For stability, excavate a shallow trench and set bricks on a 1-inch sand base.
Add Personality With Budget-Friendly Decor and Lighting
Hardscaping and plants do the heavy lifting, but small decor touches make a yard feel personal. Solar path lights (available for $1–$2 each at discount stores) line walkways without wiring or electric costs. They’re not bright enough for security lighting, but they add ambiance. Stake them firmly, cheap units tip over in wind.
String lights (LED versions use less power and last longer) transform patios and deck landscaping areas. Run them along fence lines, under pergolas, or between posts. Use outdoor-rated extension cords and a GFII-protected outlet. If running new electrical outdoors, check local codes, most jurisdictions require buried cable in conduit at least 12–18 inches deep. That’s a good time to call an electrician.
Repurpose items into planters: old wheelbarrows, galvanized tubs, wooden crates, even boots or buckets. Drill ½-inch drainage holes in the bottom so roots don’t rot. Vintage or thrift-store finds add character without the price tag of garden center pottery.
DIY fire pits are popular and doable. A simple in-ground pit requires digging a bowl 12–18 inches deep and lining it with fire brick or stacked stone. Above-ground pits can be built from concrete retaining wall blocks (stack them dry in a circle, 36–48 inches diameter). Check local fire codes, some municipalities restrict open fires or require a certain distance from structures. Keep a fire extinguisher or garden hose nearby and never leave a fire unattended.
For vertical interest, build simple trellises from 1×2 furring strips or bamboo stakes. Attach them to fences or walls and grow annual vines like morning glories or beans. A 6-foot trellis costs less than $10 in materials and adds height to flat yards. Design ideas can be borrowed from patio landscaping ideas that emphasize vertical growing.
Conclusion
Budget landscaping isn’t about cutting corners, it’s about making smart choices. Focus dollars on structural elements (paths, beds, ground cover) that establish the bones of the yard, then layer in plants and decor over time. Start small, finish what’s started, and avoid the temptation to tackle everything at once. A well-executed phase beats a half-finished whole yard every time.