
Table of Contents
ToggleTackling a backyard landscaping project doesn’t require a design degree or deep pockets, just a solid plan, elbow grease, and a willingness to get dirt under your fingernails. A well-designed backyard becomes an extension of the home, offering space for family dinners, play areas, or quiet mornings with coffee. But the difference between a charming retreat and a patchy mess comes down to planning, choosing the right materials, and understanding what each zone needs. This guide walks through the entire process, from setting realistic budgets to selecting plants that won’t fizzle out after one season.
Key Takeaways
- Successful landscaping backyard projects start with a clear plan that accounts for yard dimensions, drainage, sun exposure, and a realistic budget before breaking ground.
- DIY backyard renovation costs range from $3–$8 per square foot for basic plantings to $15–$40 per square foot for hardscape features like retaining walls and outdoor kitchens.
- Breaking your yard into functional zones (dining, play, garden, relaxation) with defined pathways prevents the empty lawn problem and makes the space more usable.
- Layer plants by height and bloom time—combining trees, shrubs, perennials, and native species ensures year-round color and reduces watering and maintenance needs.
- Hardscape features like patios, retaining walls, and edging provide structure and durability but require proper installation on compacted bases to prevent settling and water damage.
- Always call 811 before excavating to mark underground utilities and identify permit requirements early, especially for walls over 4 feet, electrical work, or permanent structures.
Planning Your Backyard Landscape Design
Before turning over a single shovelful of soil, successful landscaping begins with a clear plan that accounts for yard dimensions, drainage patterns, sun exposure, and realistic budgets. Winging it might work for rearranging furniture, but outdoor projects involve grading, drainage, and permanent installations that cost real money to redo.
Assess Your Space and Set a Budget
Start by sketching the yard on graph paper or using a free design app. Mark existing features: trees, slopes, utilities, and areas with standing water after rain. Check sun patterns throughout the day, south-facing zones bake in summer, while north-facing beds stay shaded. Measure accurately: a 10-foot × 12-foot patio requires roughly 3 cubic yards of gravel base plus pavers, so guesswork leads to shortages or waste.
Budget realistically. A DIY backyard renovation typically runs $3–$8 per square foot for basic plantings and mulch, $10–$25 per square foot for patios or decks, and $15–$40 per square foot for retaining walls or outdoor kitchens (material costs vary by region and grade). Prioritize projects: tackle grading and drainage first, then hardscaping, then plants. Trying to do everything at once burns through cash and leaves half-finished eyesores.
Identify permit requirements early. Retaining walls over 4 feet tall, electrical work for landscape lighting, or structures like pergolas often require permits and inspections per local building codes. Skip this step, and the county can make you tear it out.
Choose a Landscaping Style That Fits Your Home
The backyard should complement the house, not clash with it. A mid-century ranch looks sharp with clean-lined beds, ornamental grasses, and geometric pavers, while a cottage-style home suits curved pathways, perennial borders, and climbing roses. Mixing styles works if there’s a unifying thread, repeating a material like natural stone or sticking to a consistent color palette ties things together.
Climate dictates plant choices and maintenance. Xeriscaping with native grasses and succulents makes sense in arid regions, while Southeastern yards can support lush azaleas and ferns without heroic watering efforts. Fighting the local climate means constant upkeep and wasted water. Many homeowners find inspiration in regional backyard design galleries that showcase context-appropriate projects.
Essential Elements for a Stunning Backyard Landscape
A cohesive landscape balances five core elements: hardscape, plants, lighting, water features, and lawn or groundcover. Not every yard needs all five, but understanding each helps prioritize spending and labor.
Hardscape includes patios, walkways, retaining walls, and edging. It provides structure and reduces maintenance by replacing turf with durable surfaces. Concrete pavers cost $3–$6 per square foot (materials only), while natural flagstone runs $15–$30 per square foot. Both need a compacted gravel base (typically 4–6 inches of crushed stone) and 1 inch of leveling sand.
Plants add color, texture, and seasonal interest. Layer heights: trees for shade and structure, shrubs for mid-level mass, perennials and grasses for texture, and groundcovers to suppress weeds. Avoid the nursery-center trap of buying whatever looks good that day, stick to the plan, and choose plants suited to the yard’s sun, soil, and water conditions.
Landscape lighting extends usability after dark and highlights features. Low-voltage LED systems (12V) are DIY-friendly and energy-efficient. Run cable in shallow trenches (check local codes: typically 6 inches deep is sufficient for low-voltage). Solar lights work for accents but lack the output for path safety.
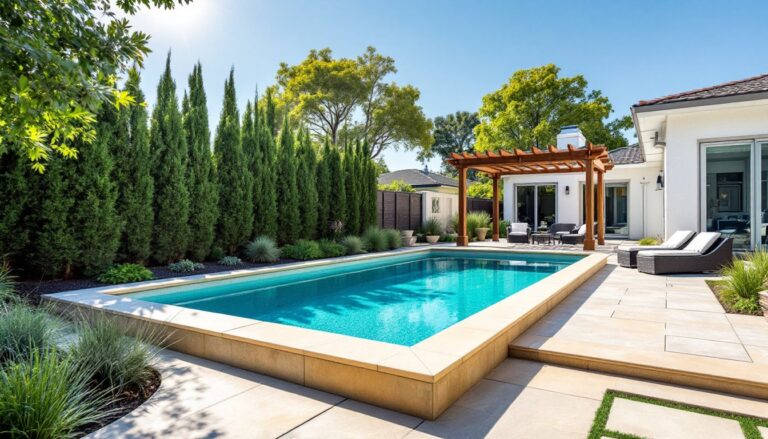
Water features range from simple birdbaths to recirculating fountains and ponds. All require a level base and access to GFCI-protected power. Pumps clog without regular cleaning, so plan for maintenance.
Lawn alternatives like clover, thyme, or mulched beds cut mowing time and water use. If keeping turf, choose a grass type suited to the region, cool-season fescue for northern zones, warm-season Bermuda or Zoysia for the South. Grass needs 6+ hours of direct sun to thrive: shaded areas do better with shade-tolerant groundcovers.
Creating Functional Zones and Pathways
Breaking the yard into distinct zones, dining, play, garden, relaxation, makes the space more usable and prevents the “big empty lawn” problem. Define each zone with changes in elevation, materials, or plantings.
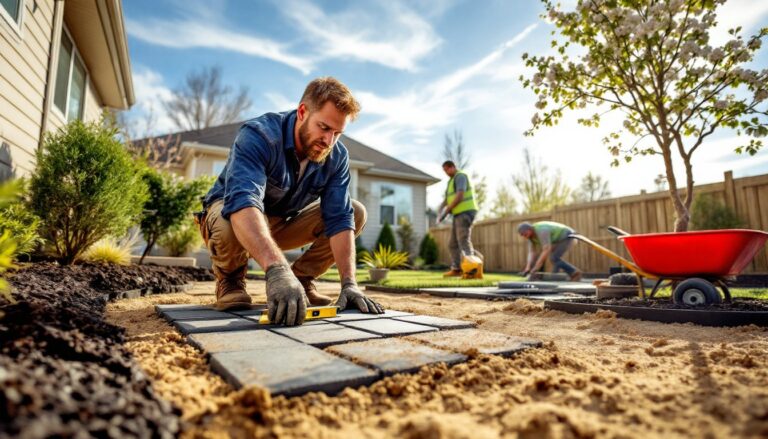
Dining and entertaining areas need level, stable surfaces. A 12-foot × 12-foot patio comfortably fits a six-person table and chairs with room to pull out seats. Pour a concrete slab, lay pavers on a gravel base, or build a ground-level deck with pressure-treated joists on concrete pier blocks. Check local frost depth requirements for footings, below the frost line prevents heaving.
Play zones benefit from soft surfaces like mulch, pea gravel, or turf. If installing a playset, use engineered wood fiber (EWF) or rubber mulch at least 9–12 inches deep under and around equipment per ASTM safety standards.
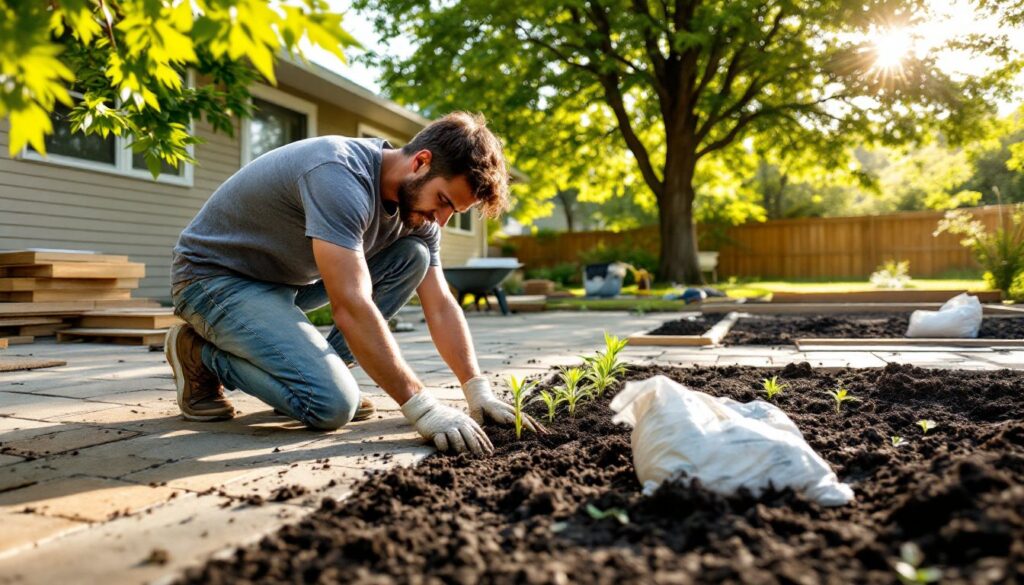
Garden beds should be easily accessible. Raised beds built from 2×10 or 2×12 lumber (actual dimensions 1.5″ × 9.25″ or 1.5″ × 11.25″) filled with a mix of topsoil, compost, and peat moss or coconut coir give better drainage and control over soil quality. Line beds with landscape fabric to slow weed growth, then top with 2–3 inches of mulch.
Pathways connect zones and guide foot traffic. A 3-foot-wide path allows one person to walk comfortably: 4–5 feet accommodates two side-by-side or a wheelbarrow. Materials include:
- Gravel or decomposed granite: Inexpensive, drains well, shifts underfoot. Edge with steel or plastic to contain. Those interested in decomposed granite pathways will find it offers a natural, permeable surface.
- Pavers or flagstone: Durable, formal look. Set on sand or mortar.
- Mulch: Informal, blends with garden beds, needs annual top-up.
- Stepping stones: Laid directly on turf or gravel: space 18–24 inches apart for average stride.
All pathways need slight grading or crowned surfaces to shed water, standing puddles lead to erosion and ice hazards.
Selecting Plants for Year-Round Beauty
Choosing plants isn’t about grabbing the prettiest blooms at the garden center, it’s matching species to site conditions and planning for four-season interest. A yard that looks great in May but turns brown by July needs a better plant palette.
Start with native plants. They’re adapted to local rainfall, pests, and soil, which means less watering, fertilizing, and spraying. Native grasses, shrubs, and perennials also support pollinators and birds. Check regional native plant databases or extension office resources for recommendations.
Layer bloom times. Early spring bulbs (crocus, daffodils) give way to late spring perennials (peonies, alliums), summer annuals and perennials (coneflowers, black-eyed Susans), and fall bloomers (asters, sedums). Add evergreen shrubs (boxwood, holly, juniper) for winter structure.
Consider foliage, not just flowers. Hostas, ferns, ornamental grasses, and shrubs with colored or variegated leaves provide texture and color even when not blooming. Fall foliage and berries (burning bush, winterberry holly) extend visual interest.
Right plant, right place. Check plant tags for USDA hardiness zone, mature size, sun requirements, and water needs. A shrub labeled “3–5 feet tall” may hit 8 feet in rich soil with regular water, plan spacing accordingly. Shade plants (astilbe, hellebores) scorch in full sun: sun-lovers (lavender, salvia) get leggy and weak in shade.
Mulch after planting. Apply 2–3 inches of shredded bark or wood chips around plants, keeping mulch 2–3 inches away from stems and trunks to prevent rot. Mulch conserves moisture, moderates soil temperature, and suppresses weeds. Replenish annually as it decomposes.
Water new plantings deeply and regularly for the first growing season. A slow trickle from a hose for 30–60 minutes beats a quick sprinkler blast, deep watering encourages deep root growth. Established plants need less frequent watering. Homeowners exploring sustainable planting techniques often find native selections reduce long-term maintenance.
Hardscaping Features That Add Character
Hardscape anchors a landscape and lasts decades if installed correctly. These permanent features define space, solve drainage problems, and reduce lawn area, but they also represent the biggest expense and labor commitment.
Retaining walls hold back soil on slopes, create level planting beds, and add vertical interest. Walls under 3–4 feet (check local codes) can be DIY projects using interlocking concrete blocks or natural stone. Taller walls require engineering, proper drainage (weep holes and gravel backfill), and often a permit. Always backfill with 3/4-inch crushed stone and install perforated drain pipe at the base to prevent hydrostatic pressure that can blow out walls.
Patios and walkways use pavers, flagstone, brick, or poured concrete. For a paver patio, excavate to depth (base + sand + paver thickness), compact the subgrade, add 4–6 inches of crushed stone base in lifts (compacting each layer with a plate compactor), top with 1 inch of leveling sand, screed smooth, lay pavers, and sweep polymeric sand into joints. Polymeric sand hardens when wet, locking pavers and resisting weed growth.
Edging separates beds from lawn and keeps mulch in place. Options include:
- Steel or aluminum edging: Clean lines, invisible once installed, lasts decades. Stake every 3–4 feet.
- Plastic edging: Cheap, flexible, visible, degrades in UV over time.
- Stone or brick: Attractive, labor-intensive, can shift.
- Concrete mow strip: Poured 4 inches wide and flush with turf, keeps mower wheels on a hard surface.
For those looking at creative hardscape options, brick offers a classic, durable choice for edging and walkways.
Fire pits and outdoor kitchens require non-combustible materials (stone, concrete, steel) and safe clearances from structures per local fire codes. Gas lines need licensed plumbers in most jurisdictions. Wood-burning fire pits should sit on gravel or pavers, never directly on turf.
Pergolas and arbors provide vertical structure and partial shade. Use pressure-treated or rot-resistant lumber (cedar, redwood) and galvanized or stainless hardware. Footings should extend below frost line: floating pergolas on pier blocks work in mild climates but may shift in freeze-thaw zones. Consider integrating ideas from modern outdoor structures for a streamlined aesthetic.
Always call 811 (“Call Before You Dig”) at least 48–72 hours before excavating to mark underground utilities. Hitting a gas or electric line isn’t just expensive, it’s dangerous.