
Table of Contents
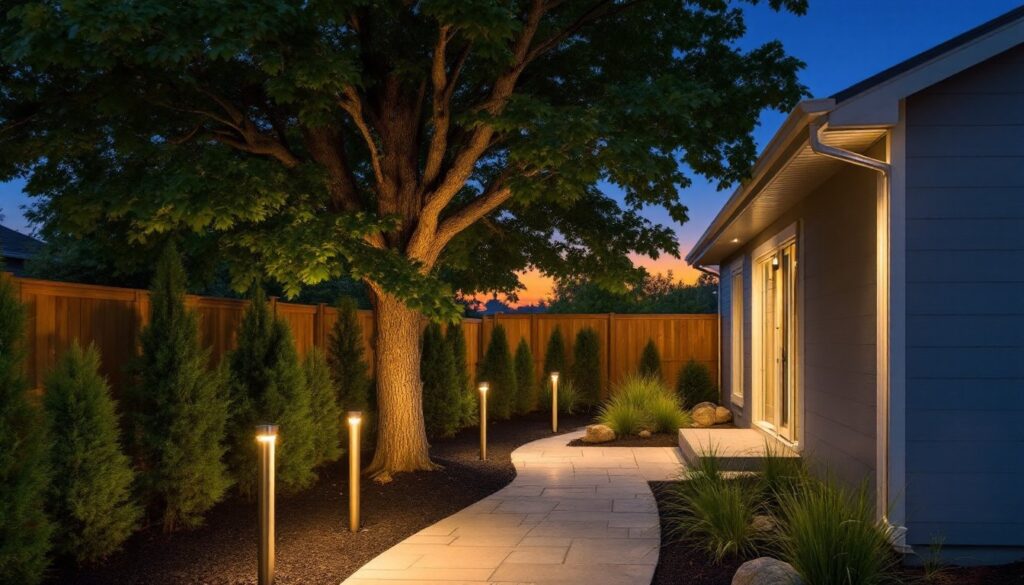
ToggleDone right, outdoor lighting turns a forgettable yard into something that stops neighbors mid-walk. It’s not just about flipping a switch, strategic landscape lighting extends usable hours, improves safety on walkways, and highlights features you’ve spent weekends building. Whether someone’s navigating a gravel path or showcasing a mature oak, lighting makes the investment visible after sunset. This guide covers fixture types, layout strategy, and installation methods that homeowners can tackle without hiring an electrician for every run.
Key Takeaways
- Strategic outdoor lighting for landscaping improves safety on walkways, extends usable outdoor space, and deters burglaries while showcasing hardscape and plant investments after sunset.
- Path lights (12–18 inches tall) spaced 8–10 feet apart provide even coverage for gravel and paver walkways, while spotlights and uplights accent architectural features and trees from 2–3 feet away.
- Low-voltage (12V/24V) systems are the DIY-friendly standard for landscape lighting, requiring only a transformer, wire, and fixtures—no permits needed in most municipalities, making installation accessible for homeowners.
- LED bulbs consume 75% less power than incandescent equivalents and last 25,000+ hours, allowing more fixtures per transformer run while maintaining warm color temperatures (2700K–3000K) for residential appeal.
- Test fixture placement with stakes and battery-powered lights at dusk before digging to prevent glare, dark gaps, and voltage drop issues caused by undersized wire or overloaded circuits.
- Shallow trenching (6 inches deep), proper wire gauge selection (12-gauge for runs up to 100 feet), and weather-resistant connectors rated for direct burial ensure reliable outdoor lighting performance for years.
Why Outdoor Lighting Matters for Your Landscape
Landscape lighting solves real problems. Unlit steps and walkways are liability risks, trip hazards multiply after dark, especially on uneven flagstone or gravel paths. Insurance claims for falls on residential property spike in poorly lit areas, making path lighting a practical investment, not just cosmetic.
Beyond safety, lighting extends functional outdoor space. A well-lit patio or deck becomes usable for evening meals, assignments sessions, or tool organization well past sunset. For homeowners who’ve invested in hardscaping or plantings, lighting ensures those features don’t disappear for half the day.
Security is the third benefit. Motion-activated fixtures and strategically placed spotlights eliminate dark corners near entry points. Burglars prefer unlit homes, visible activity deters opportunistic break-ins. While lighting won’t replace a security system, it’s a first line of defense that also makes keys easier to find at the front door.
Types of Outdoor Landscape Lighting to Consider
Matching fixture type to function prevents both over-lighting (the “stadium effect”) and under-lighting that renders features invisible.
Path and Walkway Lights
Path lights mount low to the ground, typically 12 to 18 inches tall, and cast downward pools of light to define edges without glare. They’re the workhorses for gravel paths, paver walkways, and driveway borders. Space fixtures 8 to 10 feet apart for even coverage: closer spacing works for curved paths where sightlines change.
Materials matter. Cast aluminum and powder-coated steel withstand freeze-thaw cycles better than thin plastic housings. Look for fixtures with shielded bulbs to prevent uplighting into eyes, bare bulbs create glare that defeats the purpose. Bollard-style lights (12–24 inches tall) work for wider areas like courtyards but feel oversized on narrow garden paths.
Solar path lights are convenient for areas far from electrical sources, though battery performance drops in shaded yards or winter months. Hardwired low-voltage systems offer consistent brightness and longer fixture life.
Spotlights and Uplights
Spotlights throw focused beams to accent trees, architectural details, or water features. Uplighting, placing fixtures at ground level aiming upward, creates dramatic shadows through tree canopies or against textured walls. A single 20-watt LED uplight can illuminate a 15-foot tree: adjust beam spread (narrow spot vs. wide flood) based on feature size.
Install uplights 2 to 3 feet from the base of trees or shrubs to avoid harsh,직접 lighting that flattens texture. For flagpoles or columns, place fixtures closer, 6 to 12 inches, for even wash. Adjustable heads let homeowners refine aim as plants grow.
Downlights (also called moon lights) mount in tree branches or under eaves to simulate natural light. They’re ideal for patios and seating areas where upward glare would annoy guests. Use shielded fixtures to prevent light spill into neighboring yards, a common code complaint in dense subdivisions.
Planning Your Landscape Lighting Layout
A lighting plan prevents both dark gaps and over-lit zones that waste energy. Start by sketching the yard to scale on graph paper, marking existing features: walkways, plantings, structures, and electrical access points.
Prioritize by function: safety lighting first (steps, path edges, door entries), then accent lighting for focal points. Avoid lighting everything, strategic darkness creates contrast that makes lit features pop. A floodlit yard looks flat and institutional.
Test fixture placement before digging. Use stakes and battery-powered work lights to mock up positions at dusk. Walk the yard, checking for glare at eye level and gaps in coverage. Adjust spacing until the layout feels balanced.
For low-voltage systems (the DIY-friendly standard), plan wire runs from the transformer location. 12-gauge wire supports runs up to 100 feet: 14-gauge works for shorter runs under 50 feet. Voltage drop becomes an issue beyond manufacturer specs, distant fixtures dim noticeably if wire is undersized.
Check local codes. Most municipalities allow low-voltage landscape lighting (12V or 24V) without permits, but line-voltage systems (120V) typically require licensed electricians and inspections. If tapping into household circuits for transformers, ensure the circuit can handle added load, most landscape setups draw 100 to 300 watts total.
Incorporating lighting into a modern landscaping plan from the start simplifies installation. Retrofit projects require more care to avoid damaging existing plantings or irrigation lines.
Installation Tips for DIY Landscape Lighting
Low-voltage kits from home centers include a transformer, wire, and fixtures, a solid starting point for first-timers. The transformer steps household 120V down to safe 12V or 24V, usually mounting near an exterior outlet with GFCI protection.
Step-by-step installation:
-
Mount the transformer on an exterior wall near a GFCI outlet. Keep it at least 12 inches above grade to prevent water intrusion. If the outlet lacks GFCI protection, replace it, this is required by NEC Article 210.8 for outdoor receptacles.
-
Lay out wire along the planned route without burying it. Connect fixtures using twist-on connectors or manufacturer-provided clips. Some systems use quick-connect hubs that pierce wire insulation, reliable if installed correctly, prone to corrosion if not.
-
Test the system before trenching. Power on the transformer at dusk and walk the layout. Check for dim fixtures (voltage drop or poor connections), excessive glare, or misaligned beams. Adjust as needed.
-
Bury wire in shallow trenches, 6 inches deep is standard for low-voltage cable. Use a flat spade or trenching tool: avoid power trenchers unless running long distances. Leave slight slack at each fixture to allow for ground settling. Mark wire routes on the yard sketch for future reference (helpful when digging garden beds later).
-
Secure fixtures with provided stakes, driving them fully into soil. Loose stakes shift over time, throwing off aim. For uplights near trees, avoid root zones, place fixtures between major roots.
Safety warnings: Always wear safety glasses when driving stakes into rocky soil, metal stakes can spark against stones. Use gloves when handling cut wire to avoid sharp edges. Turn off power at the transformer during all connections.
Common mistakes include overloading a single wire run (causes voltage drop) and using indoor-rated wire connectors outdoors (they corrode). Invest in silicone-filled wire nuts or heat-shrink connectors rated for direct burial.
For deck lighting integrated with landscape systems, run dedicated wire loops to avoid overloading. Deck rail lights and stair tread lights often draw more current than path lights.
Choosing the Right Bulbs and Power Sources
LED bulbs dominate landscape lighting now, they draw 75% less power than incandescent equivalents and last 25,000+ hours. A 3-watt LED produces roughly the same light as a 20-watt halogen, meaning transformers can power more fixtures per run.
Color temperature affects mood. 2700K to 3000K (warm white) mimics incandescent light and suits residential landscapes. Cooler temperatures (4000K+) feel sterile, acceptable for security lighting but harsh for garden settings. Avoid RGB color-changing gimmicks unless the yard doubles as a seasonal display.
Check beam spread specs. Narrow spots (15–25 degrees) work for uplighting tall features: wide floods (60+ degrees) cover ground areas or short shrubs. Mismatched beams waste light or create dark patches.
Power sources split into three categories:
-
Low-voltage (12V/24V): The DIY standard. Safe to install without permits in most areas, supports long wire runs, and widely available at home centers. Requires a transformer plugged into 120V outlet.
-
Solar: No wiring, ideal for remote spots like pathway edges far from power. Performance depends on sun exposure, shaded panels struggle, and battery life degrades after 2–3 years. Suitable for accent lighting, less reliable for safety-critical paths.
-
Line-voltage (120V): Bright and powerful, used for large security floods or commercial-grade fixtures. Requires buried conduit, GFCI protection, and usually permits. Not beginner-friendly, hire an electrician unless already comfortable with household wiring.
Transformer sizing: Add up fixture wattages and multiply by 1.25 for safety margin. A 300-watt transformer comfortably powers 15 fixtures at 15 watts each (225 watts total load). Undersized transformers overheat and trip.
Timers and photocells automate operation. Photocells turn lights on at dusk and off at dawn, simple but inflexible. Digital timers allow custom schedules (e.g., lights off at 11 PM to save energy). Smart transformers connect to Wi-Fi for app control, useful for seasonal adjustments without rewiring.
Maintenance is minimal but not zero. Clean fixture lenses annually to prevent dirt buildup that blocks light. Check wire connections every few years, moisture causes corrosion in poorly sealed connectors. Replace LEDs when output drops noticeably, typically after 10+ years of nightly use.
For homeowners incorporating rock features or water elements, choose fixtures rated IP65 or higher for weather resistance. Cheaper units with IP44 ratings fail quickly in wet climates.